Virtualbox is Oracle’s solution to visualization and as such it is very powerful. It is similar to VMware as it has much the same capabilities and you can run servers through it on an enterprise level.
For the purposes of experimenting with operating systems and learning Oracle, it gives us some amazing benefits and makes the whole process easier. (Snapshots, rolling back machines and the ability to quickly stand up new machines using existing resources gives us tremendous flexibility.)
This tutorial is the first part in a series that will walk you through a range of Oracle tasks such as installing a database and setting up a cluster using RAC.
Some tasks will require a powerfull PC, while others won’t tax your hardware at all.
The install is straight forward. Just run the installer and follow the instructions on screen. No special instructions should be needed as you can accept the defaults.
Save the file to a convenient location and let it download.
Download and save the OEL ISO.
Once you have the operating system downloaded, you can start creating your virtual machine. Open up Virtualbox and click on the ‘New’ button:
Create a machine with Virtualbox.
Next, give your VM a name and select ‘Linux’ for the type and ‘Oracle for the version.
Create a new machine with Virtualbox
Click next and allocate some memory to the VM. You can change this later after the VM has been set up but if you are going to be installing Oracle, you will need at least 1 Gb so you may as well set it to that for now:
You are going to need a hard disk for your VM so select ‘Create a virtual hard drive now’ and click on ‘Create’
Select ‘Dynamically Allocated’ so that your VM will only use the space on the physical hard drive as and when it is needed which will save you space if you are not using it.
Set it to whatever amount that you want but remember that while you can add other disks to your VM, you will not be able to grow this disk past it’s initial limit.
I recommend that you set it to at least 10Gb for now.
Give the disk a name so that you can easily identify it and click ‘Create’
You will be taken back to the main Virtualbox window. the VM is created but we are not finished yet as there are some settings to change and we need to add an operating system for this to work!
Click on the settings buton (making sure that your new VM is selected)
Under the ‘General’ section select the ‘Advanced’ tab and set both the ‘shared clipboard’ and ‘Drag ‘n’ Drop’ to ‘Bidirectional’ (this is an optional step which makes it a bit nicer to use inside of your host operating system).
Clisk on system and uncheck ‘Floppy’ as we wont be needing it.
Under storage, click on ‘Empty’ under the ‘IDE Controller’ section
Click on the image of a CD to the right of the ‘CD/DVD Drive’ section under ‘Attributes’
This will allow you to select your operating system DVD ISO from which your VM will boot the first time.
Click on ‘Choose a virtual CD/DVD Disk file and open your ISO.
You will see the ISO in the information section:
Click on the ‘Shared Folders’ section and on the ‘Add a Folder’ button.
Select a folder on your host machine to be a shared folder. This will allow you to easily transfer files between your host machine and your new VM.
Click ‘Auto-Mount’ and then ‘OK’
Click ‘OK again to close the ‘Settings’ window.
Click Start Machine:
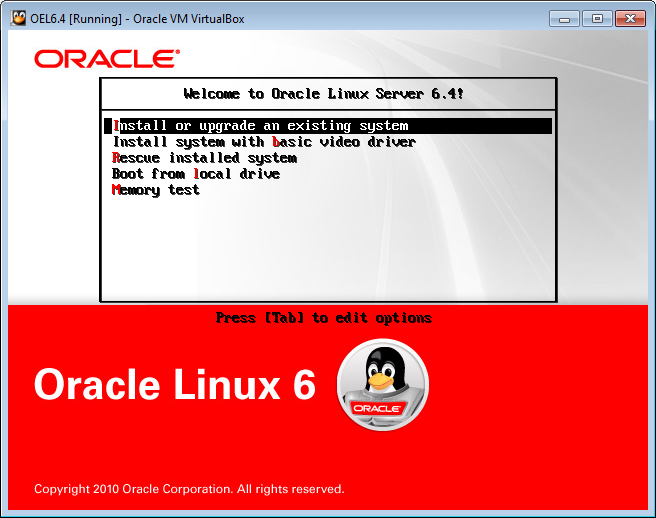
The machine boots from the supplioed ISO and starts the install process manually:
The VM should find the installation media and start the install process off. YOu will probably be waiting 1 – 2 minutes.
At the next screen click ‘Next’
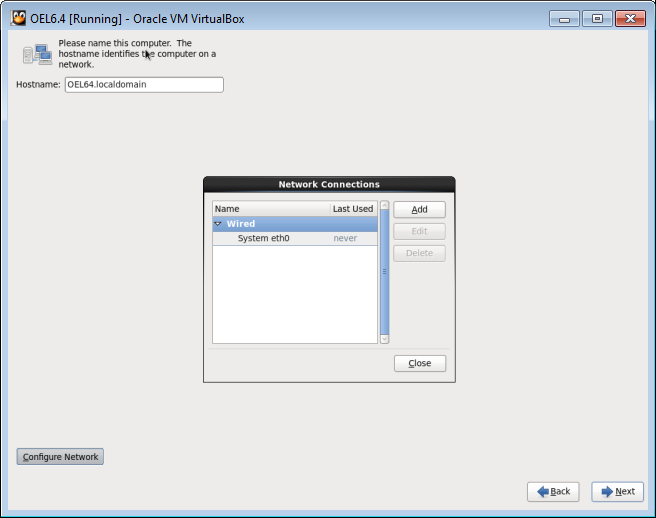
Give your VM a name:
Click ‘Configure Network’
Click on the network adapter then on ‘Edit’
Select ‘Connect Automatically’ then click ‘Apply’, ‘Close’ then ‘Next’
Select your timezone:
Enter your password twice:
Leave the option ‘Replace Existing Linux Systems’ checked and click ‘Next’
Let it do its Dependency checks then select ‘Databases’ and uncheck all of the options
Select Desktops and check everything except KDE Desktop
Then click next.
The install will begin and will also update the packages that are selected. This will take some time.
Once the install is finished, click on ‘Reboot’ to finish the process.
We are nearly finished the O/S install – Just some post install setup to do now.
Wait for your VM to reboot and click ‘Forward’
Select the ‘Agree’ option and click ‘Forward’
Click forward again to ignore the Software updates information
You will be prompted to create a non root user. We will use this opportunity to create our ‘Oracle’ user.
Set the username as oracle and enter a password.
On the next screen, you can either set the time manually or select ‘Syncronise date and time over the network’
Then click next.
Ignore the message about kdump and click ‘OK’ then ‘Finish’
Thats it! YOu will now have a login prompt with out Oracle user selected. Login with your password.
Now might be a good time to take a snapshot in case we mess anything up later on and we want to restore to a clean slate.
Login then go to the ‘System’ menu and select ‘shut down’, then click ‘Shut Down’ again.
Once your VM has shut down, its time to take a snapshot.
That way, we have a way to go back to a clean machine state that we know works if we have any problems further down the road.
On the main Virtualbox screen,click on ‘Snapshots on the right hand side.
Then click the camera icon to take a new snapshot.
Give your snapshot a name and a description and click ‘OK’
You can now click on the ‘Start’ button to boot your VM up again.
Log in as the ‘oracle’ user once you get to the login prompt.
Click on ‘Applications’ -> ‘System Tools’ then drag ‘Terminal’ onto your desktop (we are going to be using it a lot)
You will notice that at the top of the screen on the menu bar, there is an icon of two computers with a red cross on it. That is telling you that you have no active network connections
Click on it and select your available network connection:
Click on the icon and it should connect.
Right click on the icon and select edit connections
Select your connection, click edit then check the ‘Connect Automatically’ box
This should now connect without you having to do anything.
You will need to provide your root password to do this:
And that is Basically it. You now have Oracle Enterprise Linux installed on Virtualbox – Ready for you to start experimenting with.
The next article in this series will walk you through installing guest additions on your VM which will make the whole experience much nicer by allowing mouse integration, cut and paste and shared folders with your host OS.