Automatic SQL Tuning in Oracle 11g


The Automatic Database Diagnostic Monitor in Oracle 11g
The ADDM in Oracle 11g

The automated tuning process in Oracle 11g is implemented by a number of functions in the Oracle database:

Automatic Database Diagnostic Monitor (ADDM)

Takes input from the AWR reports which it analyses in order to identify potential bottlenecks. If the statistics level parameter is set to TYPICAL or ALL then the ADDM is ran every time an AWR snapshot is taken.

Reports can be vierwed through Enterprise manager but can also be generated with the addmrpt.sql script located at $ORACLE_HOME/rdbms/admin/addmrpt.sql

SQL Tuning Advisor

The optimizer can run in 2 modes, Normal and Tuning. In Normal mode, the optimizer must produce a plan in a very short timeframe and so has to accept the information that it has is up to date and accurate. The alternative is Tuning mode where the optimizer is given more time so that it can perform analysis and gather more information in rder to produce a more accurate and efficient plan.

The ADDM identifies SQL that could be improved and passes it to the SQL Tuning Advisor. This invokes the Automatic Tuning Optimizer and evaluates possibilities for improvement. The automatic Tuning Advisor performs a range of different types of analysis including statistics analysis (gathering stats), SQL profiling (creating new SQL profiles), Access path analysis (adding aindexes to allow faster access to data) and SQL structure analysis (actually rewriting or rather suggesting options for rewriting SQl statements).

From Version 11g, the Automatic SQL Tuning Advisor is ran (by default) during the nightly maintanance window. While it does not automatically implement suggestoins, it can be set up to do so.

You can use the ‘ENABLE‘ or ‘DISABLE‘ procedures of the DBMS_AUTO_TASK_ADMIN package to let the automatic tuning job run or not. Setting the STATISTICS_LEVEL to BASIC will also disable it because that stops stats gathering be the AWR.

— Enable

BEGIN

DBMS_AUTO_TASK_ADMIN.enable(

client_name => ‘sql tuning advisor’,

operation => NULL,

window_name => NULL);

END;

/

When it does run, the procedure is as folows:

  1. Candidate SQL queries are identifed from the AWR. Only statements with execution plan that has a high potential for improvement and a high impact on the system are considered.
  2. Each statementnd is invidually tuned by calling the SQL Tuning Advisor. The only recommendation that can be automatically implemented are SQL profiles.
  3. SQL profiles are implemented when:
    • There is at least 3 fold improvement.
    • ACCEPT_SQL_PROFILES task parameter is TRUE

These profiles will have a type of AUTO in DBA_SQL_PROFILES

How to Setup and Configure Automatic SQL Tuning

Automatic SQL tuning task can be configured with the DBMS_SQLTUNE package. Only SYS can do this.

You can turn on or off the acceptance of automatically generated SQL profiles with the SET_TUNING_TASK_PARAMETER procedure.

BEGIN

DBMS_SQLTUNE.SET_TUNING_TASK_PARAMETER( task_name = > ‘SYS_AUTO_SQL_TUNING_TASK’,

parameter = > ‘ACCEPT_SQL_PROFILES’,

value = > ‘TRUE’);

END;

 Additional parameters:

  • ACCEPT_SQL_PROFILE – automatically accept profiles?
  • MAX_SQL_PROFILES_PER_EXEC – maximum number of profiles to evaluate per execution (default 20).
  • MAX_AUTO_SQL_PROFILES – total auto profiles allowed on the system (default 1000).
  • EXECUTION_DAYS_TO_EXPIRE – default 30 days – how long to save task history

Viewing Automatic SQL Tuning Reports

You can view the Automatic SQL Tuning Reports through Enterprise Manager as well as via the DBMS_SQLTUNE package – DBMS_SQLTUNE.REPORT_AUTO_TUNING_TASK

VARIABLE l_report CLOB;

BEGIN

:l_report := DBMS_SQLTUNE.report_auto_tuning_task(

begin_exec => NULL,

end_exec => NULL,

type => DBMS_SQLTUNE.type_text, — ‘TEXT’

level => DBMS_SQLTUNE.level_typical, — ‘TYPICAL’

section => DBMS_SQLTUNE.section_all, — ‘ALL’

object_id => NULL,

result_limit => NULL);

END;

/


SET LONG 1000000

PRINT :l_report

There are several useful views that can be referred to and are worth exploring to gain more information on Automatic SQL Tuning.

  • DBA_ADVISOR_ACTIONS – Actions associated with recommendations
  • DBA_ADVISOR_TASKS
  • DBA_ADVISOR_EXECUTIONS – Metadata for task executions
  • DBA_ADVISOR_FINDINGS
  • DBA_ADVISOR_RECOMMENDATIONS
  • DBA_ADVISOR_RATIONALE
  • DBA_ADVISOR_SQL_STATS
  • DBA_ADVISOR_SQLPLANS


How to Install Virtualbox Guest additions for Oracle Enterprise Linux 6


This tutorial leads straight on from ‘How to install Oracle Enterprise Linux 6 on Virtualbox’ and assumes that you have a clean install to work from.

If you haven’t installed OEL6 or have any problems with this tutorial, I recommend that you follow that tutorial before this one.
So, in virtual box, Guest additions gives you some cool stuff like improved mouse pointer integration and having shared folders between your host and your guest operating system and this makes it a lot easier to transfer files to your virtual machine.
All of the subsequent tutorials will assume that you have Guest additions installed.
It should be simple! You just click the menu item, the system mounts some files and runs  them and hey presto, guest additions are installed and working. Unfortunately, in Oracle Linux 6, it doesn’t work. The process completes but the install does not work.
The good news is that once you know how, you can fix this easily.
First, make sure that you can see the Virtialbox menubar at he top of the window.  If youare in scale mode pres R. CTRL and ‘C’ to exit into normal mode.
Next, go to the ‘Devices’ menu and click ‘Install Guest Additions’
Install Virtualbox Guest Additions
Click Autorun
Click Autorun
An icon should appear on your desktop and a dialog will ask you what to do. Just click ‘OK’
Click run at the next prompt then enter your root password to authenticate.
The install script will run but will fail:
The install script will fail to install the guest additions
You are told to to look in the log file:  /var/log/vboxadd-install.log
where you will see the error:
/tmp/vbox.0/Makefile.include.header:97: *** Error: unable to find the sources of your current Linux kernel. Specify KERN_DIR=<directory> and run Make again
So, as you may have guessed, you need to install the kernel source.
 
The script actually gives you the instructions that you need to follow. In this case it suggests that you run 
> yum install kernel-uek-devel-2.6.39.400.17.1.el6uek.x86_64
This might be different for you so just follow the instructions that the script gives you.
Then
> yum install gcc
 
That should run without a problem, so now you can rerun the ‘Guest Additions’ installer again.
Rerun the guest additions installer
Click run and enter your root password when prompted.
The installer will run again and should succeed this time.
Re run the guest additions installer
This time the guest addittions installer should complete successfully.
Thats it. Guest Additions are now installed. Give your VM a reboot and you will find your shared folder is mounted.
 
Now,shutdown your VM and take a snapshot.
 
Finally, we will export the VM so that you have a clean install to start other projects from.
 

How to install OEL6 on Virtualbox

Virtualbox is Oracle’s solution to visualization and as such it is very powerful. It is similar to VMware as it has much the same capabilities and you can run servers through it on an enterprise level.

For the purposes of experimenting with operating systems and learning Oracle, it gives us some amazing benefits and makes the whole process easier. (Snapshots, rolling back machines and the ability to quickly stand up new machines using existing resources gives us tremendous flexibility.)

This tutorial is the first part in a series that will walk you through a range of Oracle tasks such as installing a database and setting up a cluster using RAC.

Some tasks will require a powerfull PC, while others won’t tax your hardware at all.


Ok, lets get started

How to install OEL6 on Virtualbox

– First get virtualbox:

The install is straight forward. Just run the installer and follow the instructions on screen. No special instructions should be needed as you can accept the defaults.
Get a copy of Oracle Enterprise Linux 6.3:
Find your nearest mirror here:
Then select your ISO image:
Download the ISO for OEL 6


Find the specific ISO that you want
Find the specific ISO that you want.


Save the file to a convenient location and let it download.
Download and save the OEL ISO
Download and save the OEL ISO.


Once you have the operating system downloaded, you can start creating your virtual machine. Open up Virtualbox and click on the ‘New’ button:
Create a machine with Virtualbox
Create a machine with Virtualbox.


Next, give your VM a name and select ‘Linux’ for the type and ‘Oracle for the version.

Create a new machine with Virtualbox
Click next and allocate some memory to the VM. You can change this later after the VM has been set up but if you are going to be installing Oracle, you will need at least 1 Gb so you may as well set it to that for now:
You are going to need a hard disk for your VM so select ‘Create a virtual hard drive now’ and click on ‘Create’
Select ‘Dynamically Allocated’ so that your VM will only use the space on the physical hard drive as and when it is needed which will save you space if you are not using it.
Set it to whatever amount that you want but remember that while you can add other disks to your VM, you will not be able to grow this disk past it’s initial limit.
I recommend that you set it to at least 10Gb for now.
Give the disk a name so that you can easily identify it and click ‘Create’
You will be taken back to the main Virtualbox window. the VM is created but we are not finished yet as there are some settings to change and we need to add an operating system for this to work!
Click on the settings buton (making sure that your new VM is selected)
Under the ‘General’ section select the ‘Advanced’ tab and set both the ‘shared clipboard’ and ‘Drag ‘n’ Drop’ to ‘Bidirectional’ (this is an optional step which makes it a bit nicer to use inside of your host operating system).
Clisk on system and uncheck ‘Floppy’ as we wont be needing it.
Under storage, click on ‘Empty’ under the ‘IDE Controller’ section
Click on the image of a CD to the right of the ‘CD/DVD Drive’ section under ‘Attributes’
This will allow you to select your operating system DVD ISO from which your VM will boot the first time.
Click on ‘Choose a virtual CD/DVD Disk file and open your ISO.
You will see the ISO in the information section:
Click on the ‘Shared Folders’ section and on the ‘Add a Folder’ button.
Select a folder on your host machine to be a shared folder. This will allow you to easily transfer files between your host machine and your new VM.
Click ‘Auto-Mount’ and then ‘OK’
Click ‘OK again to close the ‘Settings’ window.
Click Start Machine:
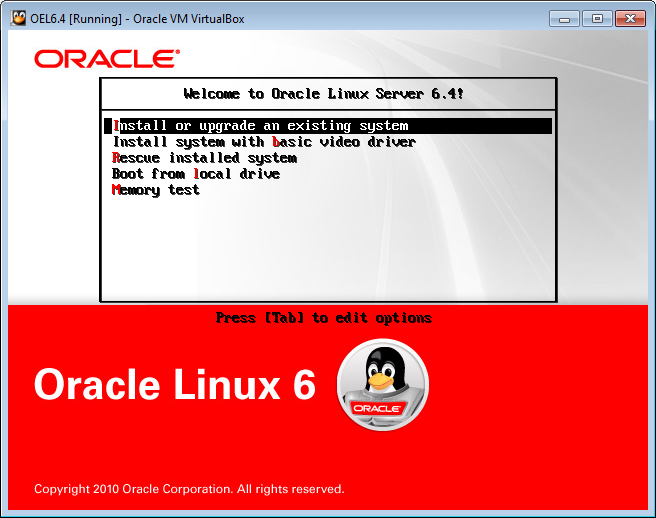
The machine boots from the supplioed ISO and starts the install process manually:
The VM should find the installation media and start the install process off. YOu will probably be waiting 1 – 2 minutes.
At the next screen click ‘Next’
Give your VM a name:
Click ‘Configure Network’
Click on the network adapter then on ‘Edit’
Select ‘Connect Automatically’ then click ‘Apply’, ‘Close’ then ‘Next’
Select your timezone:
Enter your password twice:
Leave the option ‘Replace Existing Linux Systems’ checked and click ‘Next’
Let it do its Dependency checks then select ‘Databases’ and uncheck all of the options
Select Desktops and check everything except KDE Desktop
Then click next.
The install will begin and will also update the packages that are selected. This will take some time.
Once the install is finished, click on ‘Reboot’ to finish the process.
We are nearly finished the O/S install – Just some post install setup to do now.
Wait for your VM to reboot and click ‘Forward’
Select the ‘Agree’ option and click ‘Forward’
Click forward again to ignore the Software updates information
You will be prompted to create a non root user. We will use this opportunity to create our ‘Oracle’ user.
Set the username as oracle and enter a password.
On the next screen, you can either set the time manually or select ‘Syncronise date and time over the network’
Then click next.
Ignore the message about kdump and click ‘OK’ then ‘Finish’
Thats it! YOu will now have a login prompt with out Oracle user selected. Login with your password.
Now might be a good time to take a snapshot in case we mess anything up later on and we want to restore to a clean slate.
Login then go to the ‘System’ menu and select ‘shut down’, then click ‘Shut Down’ again.
Once your VM has shut down, its time to take a snapshot.
That way, we have a way to go back to a clean machine state that we know works if we have any problems further down the road.
On the main Virtualbox screen,click on ‘Snapshots on the right hand side.
Then click the camera icon to take a new snapshot.
Give your snapshot a name and a description and click ‘OK’
You can now click on the ‘Start’ button to boot your VM up again.
Log in as the ‘oracle’ user once you get to the login prompt.
Click on ‘Applications’ -> ‘System Tools’ then drag ‘Terminal’ onto your desktop (we are going to be using it a lot)
You will notice that at the top of the screen on the menu bar, there is an icon of two computers with a red cross on it. That is telling you that you have no active network connections
Click on it and select your available network connection:
Click on the icon and it should connect.
Right click on the icon and select edit connections
Select your connection, click edit then check the ‘Connect Automatically’ box
This should now connect without you having to do anything.
You will need to provide your root password to do this:
And that is Basically it. You now have Oracle Enterprise Linux installed on Virtualbox – Ready for you to start experimenting with.
The next article in this series will walk you through installing guest additions on your VM which will make the whole experience much nicer by allowing mouse integration, cut and paste and shared folders with your host OS.

What is Oracle Exadata

Notes:

Data appliance

  • Server with preinstalled and pre optimised database
  • Hardware designed to work with the database software specifically
  • Pre configured clustered database server
Exalogic is a preconfigured clustered application server
Exadata is a pre configured clustered database server
There are other products but they are targeted at OLAP specifically (read rather than write)
Exadata supports OLTP and OLAP
The first version of Exadata was created in 2008 in collaboration with HP.
Oracle enterprise linux was the operating system used.
In 2010, Oracle started using sun hardware (after oracle bought them)
Exadata is claimed to be fastest db server in the world.
You can use either solaris 11 express or OEL 5.5
What exactly is Exadata?
Actually a cluster of machines
2 kinds of servers – db server and storage server
Storage server can often return results from memory without touching the db.
Available in :
Full rack – 8 db servers – 14 storace servers
Half rack 4,db, 7 storage
Quarter rack – 2 db, 3 storage
The size is the same, just what is in it changes
You can chose specs of the actual servers.

Perspectives on Exadata

This is a great discussion on and around Oracle Exadata by 2 performance tuning experts.


Notes:

A very relaxed presentation on the ins and outs of Exadata from a performance tuning and optimization perspective.Skip to about 10 mins in to get past the introductions.Exadata isn’t a solution to all performance problems. You can still fill up the bigger more powerfull server and you have the same issues that you had when you filled up a smaller box.

There is always faster hardware.

Smartscan.
Most apps do more than the business need requires. Giving more data to the user or carrying more data than is needed through the calulations

Filter earlier to reduce unwanted work.

Pushing that sort of work down to the hardware level makes things much faster.

Big pipe between the storage and the db buffer cache.

Difficult to predict how fast an exadata machine will perform a particular opperation because there are ahost of features that kick in at particular times.

Inconsistency in execution times can vary a lot especially before a system gets up to speed.

Documentation for exadata is not generally available to the public.
This makes learning etc difficult without buying a exadata box.
The machine had incredible performance but you need to set it up properly in order to get the most out of it.
Its much easier to optimize for the new machine at the time that you put the application on there.
Any box is likely to get filled up eventually so you should get the most out of it i.e. optimize each application.
Everything is pre-engineered by Oracle so you don’t have to configure lots of different components. In many ways like Apple where their products just work in the way that they are supposed to do.
Questions of engineered systems vs open systems and if it is a cyclical pattern.
Engineered system is low down on the list of benefits of Exadata.
The storage software is one of the biggest.
The project and knowledge required to set up your own system is often not viewed favorably within an organization where as Exadata is pre set up to give you exactly what you need to run an Oracle system.
Main changes that could be made is increased transparency because Exadata works very well but letting more people gain exposure to it and find out exactly how everything works would let them get the most out of it.
There are advantage’s to having a single vendor stack because support has to come from them and there can be no finger pointing.
Apps built to run on multiple dbs tend not to work very well anyway so you are locked in to an extent regardless.